My Easy Granny Square
- Home
- Easy Granny Square

To make this Easy Granny Square you will need to learn how to make a magic ring, and to work a chain stitch and double crochet (US). You can make your granny square as large as you want simply by adding additional rows, following the pattern set in the first five rounds.

Step by Step Instructions for this Easy Granny Square
Make a magic ring:
Round 1: ch 2, dc 2, *3 ch, dc 3, rep from * three times, 3 ch, sl st into 2nd ch.

Round 2: ch2, 2 dc, (2 dc, 3 ch, 3 dc) into corner 3 ch sp,1 ch, (3 dc, 3 ch, 2 dc) into corner 3 ch sp, 3 dc, (2 dc, 3 ch, 3 dc) in corner ch sp, 1 ch, (3 dc, 3 ch, 2 dc) into corner 3 ch sp, sl st into the 2nd ch.

Round 3: ch 2, dc 4, (2 dc, 3 ch, 3 dc) into corner 3 ch sp, 1 ch, (3 dc, 1 ch into next ch sp, (3 dc, 3 ch, 2 dc) in corner ch sp, 7 dc, (2 dc, 3 ch, 3 dc) into corner 3 ch sp, 1 ch, (3 dc, 1 ch into next ch, (3 dc, 3 ch, 2 dc) in corner ch sp, 2 dc, sl st into 2nd ch.

Round 4: ch 2, dc 6, (2 dc, 3 ch, 3 dc) into corner 3 ch sp, 1 ch, (3 dc, 1 ch) into next 2 ch sp, (3 dc, 3 ch, 2 dc) in corner ch sp, 11 dc, (2 dc, 3 ch, 3 dc) into corner 3 ch sp, 1 ch, (3 dc, 1 ch into next ch, (3 dc, 3 ch, 2 dc) in corner ch sp, 4 dc, sl st into 2nd ch.

Round 5: ch 2, dc 8, (2 dc, 3 ch, 3 dc) into corner 3 ch sp, 1 ch, (3 dc, 1 ch) into next 2 ch sp, (3 dc, 3 ch, 2 dc) in corner ch sp, 15 dc, (2 dc, 3 ch, 3 dc) into corner 3 ch sp, 1 ch, (3 dc, 1 ch into next ch, (3 dc, 3 ch, 2 dc) in corner ch sp, 6 dc, sl st into 2nd ch.
Continue working in rounds as set in the first five rounds until your square is the size you require.
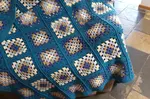
Making a blanket using your squares
You can either work one (very large) square, or make a lot of smaller squares that you join together. Joining can be done by sewing the squares together or using a crochet hook to pick up stitches on two squares and crocheting them together.
For my blanket, I used a rainbow yarn to crochet around the edges of each square. I did three rounds of single crochet around the edges of each square. I did three rounds of single crochet increasing in each corner. I then used the white yarn and my crochet hook to join the squares together. I rotated each square to create an alternating pattern.
You might like these
Making Basic Granny Squares
Basic granny squares are easy to learn, quick to do and very versatile. They can be any size you just keep working row after row until it is the size you need.
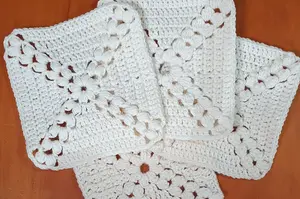
Solid Granny Square
Another version of a basic granny square is a solid granny square. This version does not have the 'gaps' between groups of three stitches.
Joining Granny Squares
the method you use for joining granny squares will have a significant effect on the look of your finished article.
Recent Articles
-
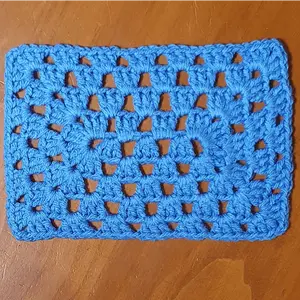
Rectangle Granny Squares
Apr 06, 26 07:27 AM
 If you want to make a rectangular blanket that is worked in one piece, you make rectangle granny squares!
 -
Bobble Granny Squares
Apr 05, 26 01:46 AM
 While I was scrolling through some of my favourite crochet sites, I came across some patterns for bobble granny squares and decided to try one
 -
Granny Squares
Apr 04, 26 12:58 AM
 granny squares