Amigurumi Octopus Keyring
- Home
- Amigurumi Octopus Keyring

If you are looking for a quick and easy project as you are learning to crochet, try this cute amigurumi octopus keyring. This amigurumi crochet project consist of two main objects, a round ball for the head and curly tendrils for the eight legs.
To make this cute keyring you will need to use the following skills/stitches:
You will also need some plush yarn and a hook in an appropriate size for that yarn. For amigurumi, I tend to go down a couple of hook size from the size recommended by the yarn manufacturer. I added a metal keyring using a small length of elastic cord.
A knitter's sewing needle (tapestry needle or something similar) will be needed to attach the legs to the body and a couple of safety eyes to give your octopus a face.

Mint Plush Octopus Keyring | © Deborah Mason and DebsHookNook
How to Make Your Amigurumi Octopus Keyring
We start with the head/body. This is basically just a ball.
Make a magic ring with 6 single crochet:
- inc in each stitch (12)
- (sc 1, inc) x 6 (18)
- sc 1, (inc, sc 2) x 5, inc, sc 1 (24)
- (sc 3, inc) x 6 (30)
- sc 2, (inc, sc 4) x 5, inc, sc 2 (36)
6-9. sc 36 (36 - 4 rounds)
- sc 2, (dec, sc 4) x 5, dec, sc 2 (30)
- (sc 3, dec) x 6 (24)
Place eyes between rounds x & x around 5 stitches apart.
- sc 1, (dec, sc 2) x 5, dec, sc 1 (18)
- (sc 1, inc) x 6 (18)
Fasten off leaving a long tail. Using the knitter’s needle gather the last 6 stitches and fasten off.
Now for the legs - make 8
Make a length of x ch. Starting t=with the second chain below the hook, make a half double crochet inc (2 x half double crochet) in each chain.
Fasten off. To make the curls twist your leg - I usually go clock wise so that the ringlet curls form.
Putting your Amigurumi Octopus Keychain Together
Once you have all eight completed, you can sew them to the base of your head/body. Use your crochet hook to thread a short piece of hat elastic through the top of the head, add your keychain and tie a firm knot. You can use a crochet hook to work the knot through the fabric of the head so that it is hidden inside.
You might like these
How to Crochet a Lovey
Would you like to know how to crochet a lovey? These lovey toys are perfect gifts for babies and toddlers.
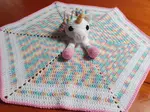
My Unicorn Lovey
My Unicorn Lovey has proven to be quite popular. I make two versions, one on a six sided blanket and the other on a 10 sided star blanket.
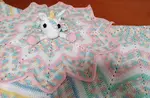
Baby Lovey Blanket - Rainbow 10 Point Star
So I made a Rainbow Unicorn Lovey and really liked the blanket colours so I decided to crochet a larger baby lovey blanket to match the unicorn lovey.
Recent Articles
-
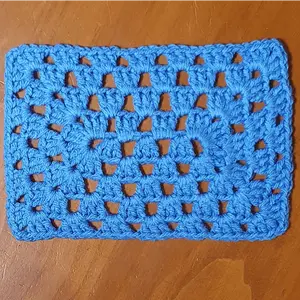
Rectangle Granny Squares
Apr 06, 26 07:27 AM
 If you want to make a rectangular blanket that is worked in one piece, you make rectangle granny squares!
 -
Bobble Granny Squares
Apr 05, 26 01:46 AM
 While I was scrolling through some of my favourite crochet sites, I came across some patterns for bobble granny squares and decided to try one
 -
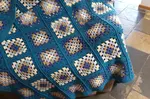
Granny Squares
Apr 04, 26 12:58 AM
 granny squares