How to Crochet an Amigurumi Ball
- Home
- How to Crochet an Amigurumi Ball

Many of the pieces you will crochet when you are making amigurumi will be round, ball-like pieces. So learning how to crochet an amigurumi ball is an important skill if you want to make amigurumi figures.
These shapes generally start with a magic circle, and the number of stitches in each round increases by a factor of six (usually but not always) until you get to the required width of your ball. You then work a specified number of rounds without increasing or decreasing. The ball is shaped at the top by decreasing the number of stitches in each round (again by a factor of six) until you only have 6 stitches remaining. Those stitches are then cinched together to close.
Of course, you will have to fill your ball with some kind of stuffing before you close the ball at the top.

Amigurumi Baby Lamb | © Deborah Mason and DebsHookNook
Lamb Pattern by Anat Tzach
The head on the lamb in the image above was a ball shape with the muzzle, ears and eyes sewn on afterwards.
Step by Step: How to Crochet an Amigurumi Ball
This is an excerpt from one of my crochet patterns. It is the instructions for the head of my amigurumi unicorn.

An amigurumi ball - my Unicorn Head | © Deborah Mason and DebsHookNook
Head: make 1
Working in rounds. Using a 3.00 mm crochet hook and the main colour.
Round 1: Sc 6 in magic ring [6]
Round 2: (inc) * 6 times [12]
Round 3: (sc 1, inc) * 6 times [18]
Round 4: (sc, inc, sc) * 6 times [24]
Round 5: (sc 3, inc) * 6 times [30]
Round 6: (sc 2, inc, sc 2) * 6 times [36]
Round 7: (sc 5, inc) * 6 times [42]
Round 8: (sc 3, inc, sc 3) * 6 times [48]
Round 9: (sc 7, inc) * 6 times [54]
Round 10-23: sc 54 [54 x 14 rounds]
Round 24: (sc 7, dec) x 6 [48]
Round 25: (sc 3, dec, sc 3) * 6 times [42]
Round 26: (sc 5, dec) * 6 times [36]
Stuff half of the head
Round 27: (sc 2, dec, sc2) * 6 times [30]
Round 28: (sc 3, dec) * 6 times [24]
Round 29: (sc 1, dec, sc 1) * 6 times [18]
Stuff the head completely with fill.
The shape of the ball should be round and well-filled.
Fasten off and leave a long thread for sewing. Use the tail to cinch the top to close.
To make an amigurumi ball, you will need to master the following stitches and techniques:
- magic ring
- double crochet (us)
- slip stitches
- chain stitches
You start by forming a magic ring and make 6 single crochets into the ring. Pull the tail tight to close. As you are working in the round (a spiral) you do not need to do a slip stitch into the first sc, but do place a marker in the last stitch of the round so that you can easily identify the end of the round.
You start the second round by working an increase (two single crochets in the same stitch) into every stitch.
For the third round, you work 1 increase and then 1 single crochet all the way around to the stitch marker.
Continue working your increase rounds (4-9) following the directions in the pattern. You will notice that the increases are not worked in the same place on subsequent rounds. If you increase in the same place you end up with a hexagon shape rather than a circle, and for a ball shape you need a circle.

Increases starting on 1st stitch of every round

Increases staggered; odd rounds starting at 1st stitch, even rounds increase starting after 1/2 of dcs between increases (i.e. inc, dc 6 becomes dc 3, inc, dc 3)
The increases finish on round 9, and at this point, you have gone from 6 stitches in round 1 up to 54 stitches at the end of round 9. The next 14 rounds are worked on these 54 stitches (no increases or decreases) to give the ball some height.


This is what your ball should look like before you start the decreases.

Stuffing the ball when you complete round 26.

Finishing round 29, adding more stuffing to ompletely fill the ball (this can be tricky), then gather the remaining stitches on the yarn tail and cinch them up to close the ball.
You might like these
Yarn Under or Yarn Over
When you are doing single crochet do you work with a yarn under or yarn over? It does make a difference.
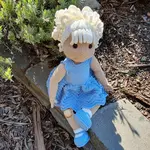
My Large Amigurumi Dolls
Let me show off a bit - check out my large amigurumi dolls. They are all hand made by me and available for purchase.
Recent Articles
-
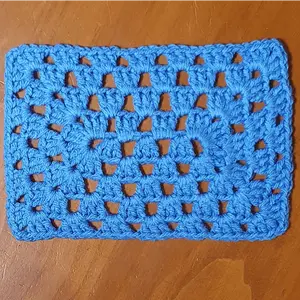
Rectangle Granny Squares
Apr 06, 26 07:27 AM
 If you want to make a rectangular blanket that is worked in one piece, you make rectangle granny squares!
 -
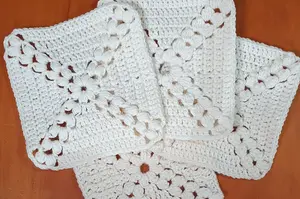
Bobble Granny Squares
Apr 05, 26 01:46 AM
 While I was scrolling through some of my favourite crochet sites, I came across some patterns for bobble granny squares and decided to try one
 -
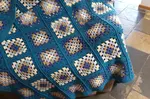
Granny Squares
Apr 04, 26 12:58 AM
 granny squares