How to Read a Crochet Pattern
- Home
- How to Read a Crochet Pattern

If you are new to crochet and you are trying to work out how to read a crochet pattern, it probably looks like it was written in a weird form of shorthand. And in a way it is. Crochet patterns (like knitting patterns) use abbreviations.
If they didn't, that 4-page pattern that you want to use would likely be up to 30 pages long!

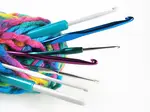
Reading a Crochet Pattern | © Deborah Mason & DebsHookNook
How to Read a Crochet Pattern - Materials
A good crochet pattern will include a section at the beginning that lists all the materials required to complete the project. This will include the yarn the pattern designer used and the tools you will need. These tools will include crochet hooks, scissors, a stitch gauge, a needle for sewing your pieces together and any other bits and pieces you need.
Those bits and pieces might include things like buttons or fasteners, filler and armature wire for toys, cotter pins or plastic joints, etc. You might not need all of the listed materials to get started, but you will definitely need the yarn and the crochet hook. You can substitute the yarn; you don't need to use the specific yarn the designer used, but you do need to use a yarn of the same weight. And if you are substituting, you should check your tension before you start to determine which size crochet hook you need to match the tension in the pattern.
How to Read a Crochet Pattern - Abbreviations
In virtually all crochet patterns, the abbreviations used will be listed on one of the first few pages. You should read through this section of your pattern before you get started to see if any of them are unfamiliar to you. If you do find some that you have not done before, it might be a good idea to practice them before starting on your project.
If you are unsure how to do an abbreviated stitch or step, YouTube is a great resource for beginners. If you go to YouTube (or Google, for that matter) and type in "how to... [insert abbreviation]", you are likely to find a video tutorial on exactly what you are looking for.
You will also need to work out whether your pattern is written using US or UK abbreviations, as these two schemas use the same abbreviation/term for very different stitches. The easy way to tell is to check your list of abbreviations to see if it includes sc (single crochet). The sc abbreviation is only used in the US version.

US or UK? | © Deborah Mason & DebsHookNook
How to Read a Crochet Pattern - Instructions
If you look at the image above, you will be able to see instructions for the first six rounds of a doll's head.
Round 1: 6 sc in MR
The shorthand in this round means: do six single crochet into a magic ring (note: as sc is used in the US schema, this pattern is a US pattern)
Round 2: 6 inc (12)
Increase (form two stitches) in each stitch of the previous round, and when you reach the end of the round, you should have twelve stitches.
Let's try a more complicated round.
Round 6: 2 sc, (inc, 4 sc) * 5, inc, 2 sc (36)
Work two single crochets, then increase in the next stitch, work four single crochets. Repeat the last two steps another four times (five times in total), increase in the next stitch, and work two single crochets to finish. At the end of the round, you should have thirty-six stitches.
How to Read a Crochet Pattern - Finishing Your Project
There will be a section in your pattern, either at the end of the instructions or as a separate section, that will give you instructions on how to put your item together. For a garment, this might include instructions on how to join the sleeves to the body, or how to do bands, add buttons or fasteners, etc.
Patterns for amigurumi (toys or figurines) have instructions on how to join your pieces together and in which order. It will tell you which row/stitch of each piece to place joints, and how to sculpt your figurine's face or attach a wig.
Again, it pays to read through this section to identify any instructions that are unclear or seem difficult. Seeking clarification (again - YouTube is great for this) and doing some practice before tackling these kinds of tasks on your project can be the difference between a figurine that you are proud of and one that ends up in the too-hard pile or in the bin!
Other Factors to Consider
Crochet patterns will involve working in the round (circular or in a spiral), in rows (one way, then turn and work back to the beginning), or a combination of both. Most patterns will use the terms round or row (i.e., round 1: or row 1:). A pattern worked in the round will not have turning chains at the end of the row instruction, whereas a pattern worked in rows will.
If you are making toys, the tension will not be a huge issue as long as you use the same brand/weight of yarn and crochet hook for the whole project. If you have an eclectic collection of crochet hooks, don't assume that all hooks claiming to be a particular size will actually be the same. I have several 4.0mm hooks that come from different sources that vary (slightly) in size, so switching from one to another will result in a tighter or looser tension for different sections of the project. The difference in size does not have to be that much for the different tension to be noticeable in your work.
You might like these
US vs UK Crochet Terms
Does you pattern use US vs UK Crochet Terms? Depending on where your crochet pattern was published, the crochet terms used will either be US or UK terms.
Crochet Hook Sizes
Crochet hook sizes can vary from country to country. So you can select the right size for the job at hand. Hook sizes range from 0.60mm right up to 25.0mm.
Basic Crochet Stitches
In Crochet, there are only a few basic crochet stitches that you need to learn, but many, many, ways to combine those stitches to form different patterns.
Recent Articles
-
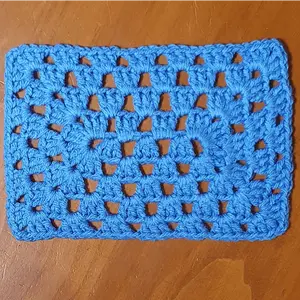
Rectangle Granny Squares
Apr 06, 26 07:27 AM
 If you want to make a rectangular blanket that is worked in one piece, you make rectangle granny squares!
 -
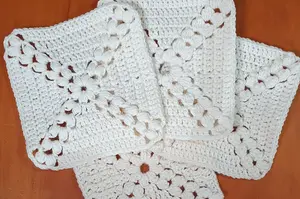
Bobble Granny Squares
Apr 05, 26 01:46 AM
 While I was scrolling through some of my favourite crochet sites, I came across some patterns for bobble granny squares and decided to try one
 -
Granny Squares
Apr 04, 26 12:58 AM
 granny squares